Output Shaft Assemble
WARNING: This page is about a different variant/trim than selected.
Tools Required
- J 6133-A Bearing Race Installer. See Special Tools .
- J 8001-3 Dial Indicator
- J 26900-12 Dial Indicator - 1-10 mm. See Special Tools .
- J 26900-13 Magnetic Indicator Base
- J 44340 Bearing Installer. See Special Tools .
- Lubricate all bearings with transmission fluid during assembly.
- The following steps apply to both the 4WD and the RWD transmission, except where noted.
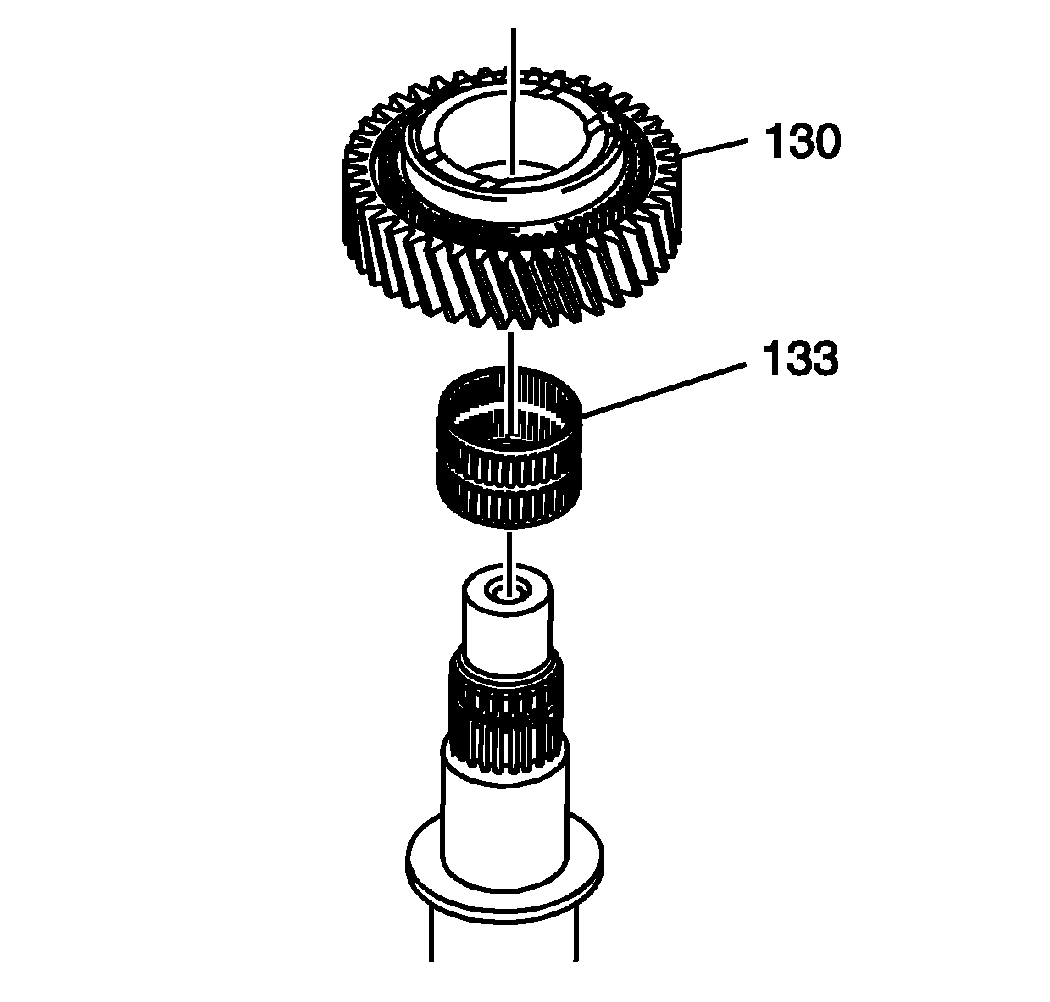
- Install the 3rd gear bearing (130) and the 3rd gear (133) on the front of the output shaft.
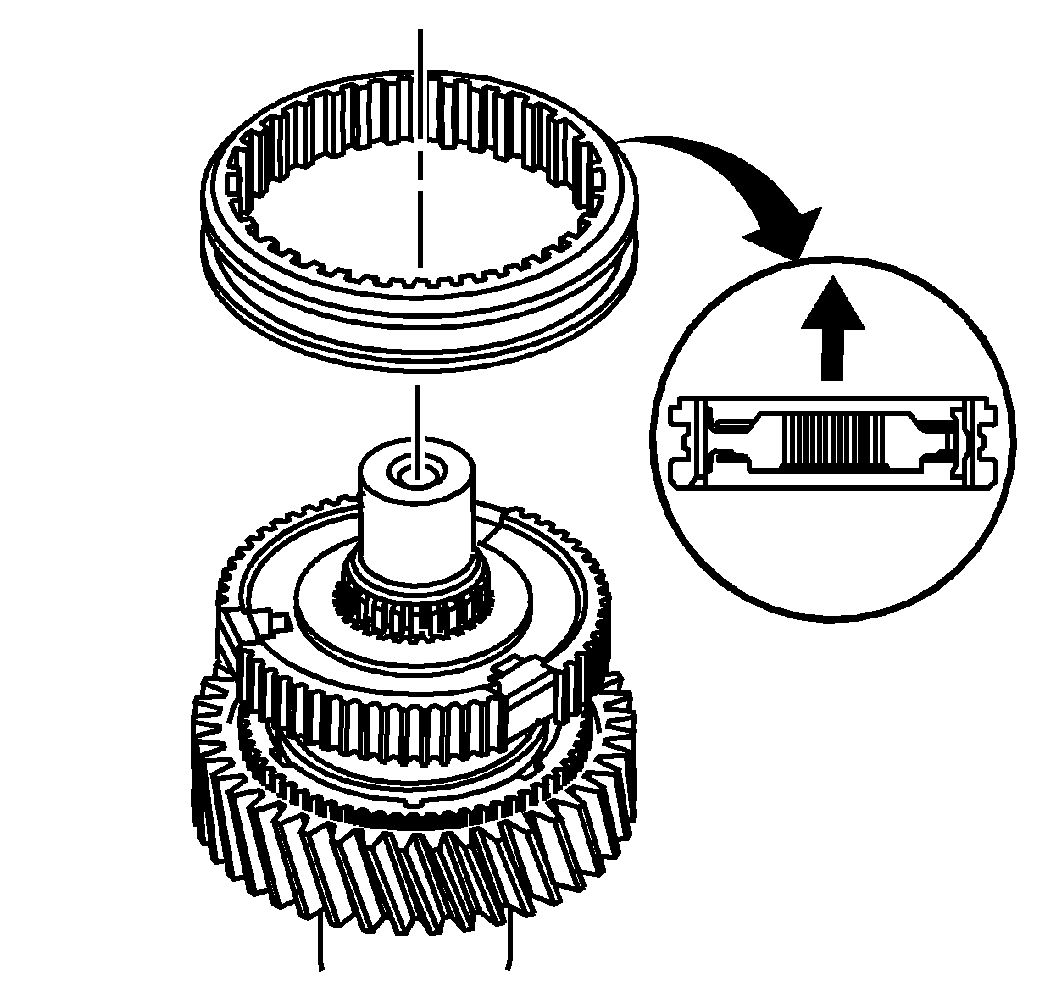
- Remove the sleeve from the 3rd/4th synchronizer assembly.
- Position the synchronizer hub and 3rd gear blocking rings on the output shaft. The smooth side of the hub goes forward, the 4th gear side.
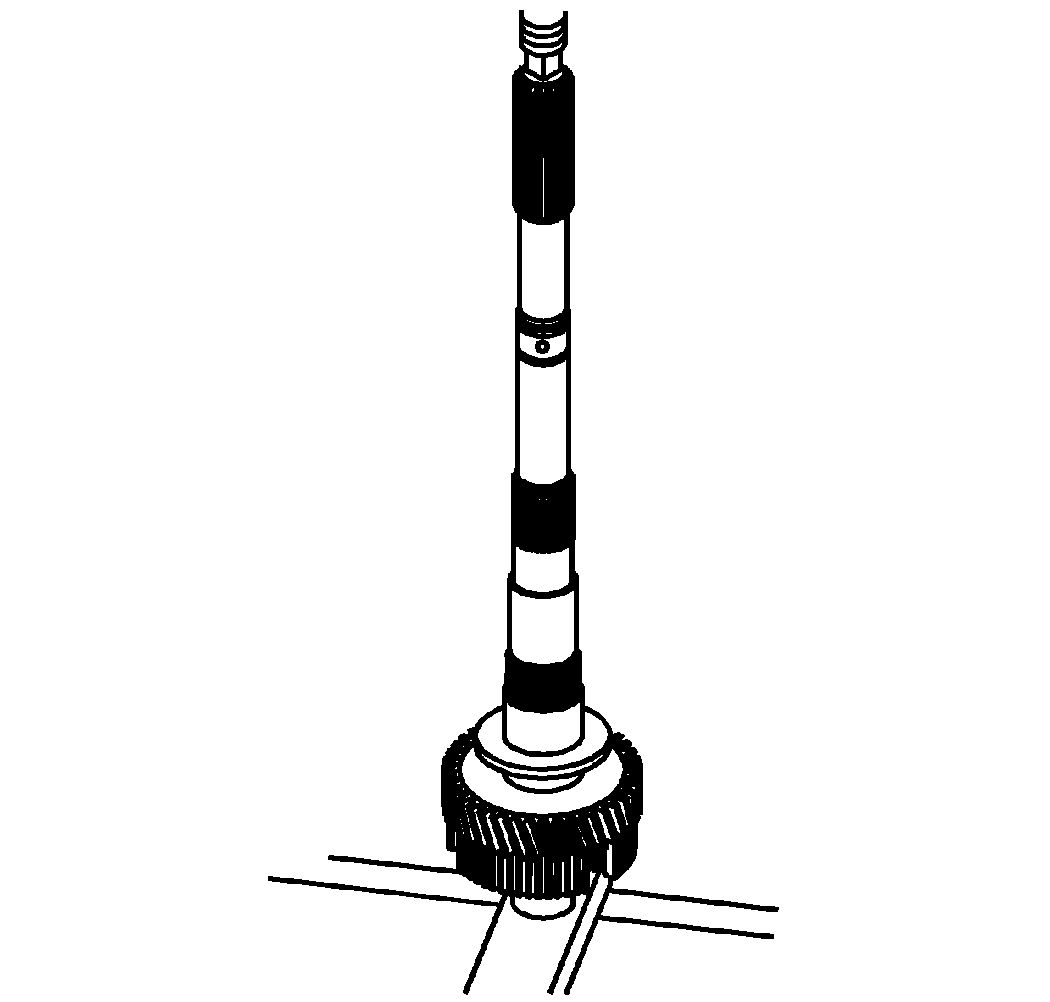
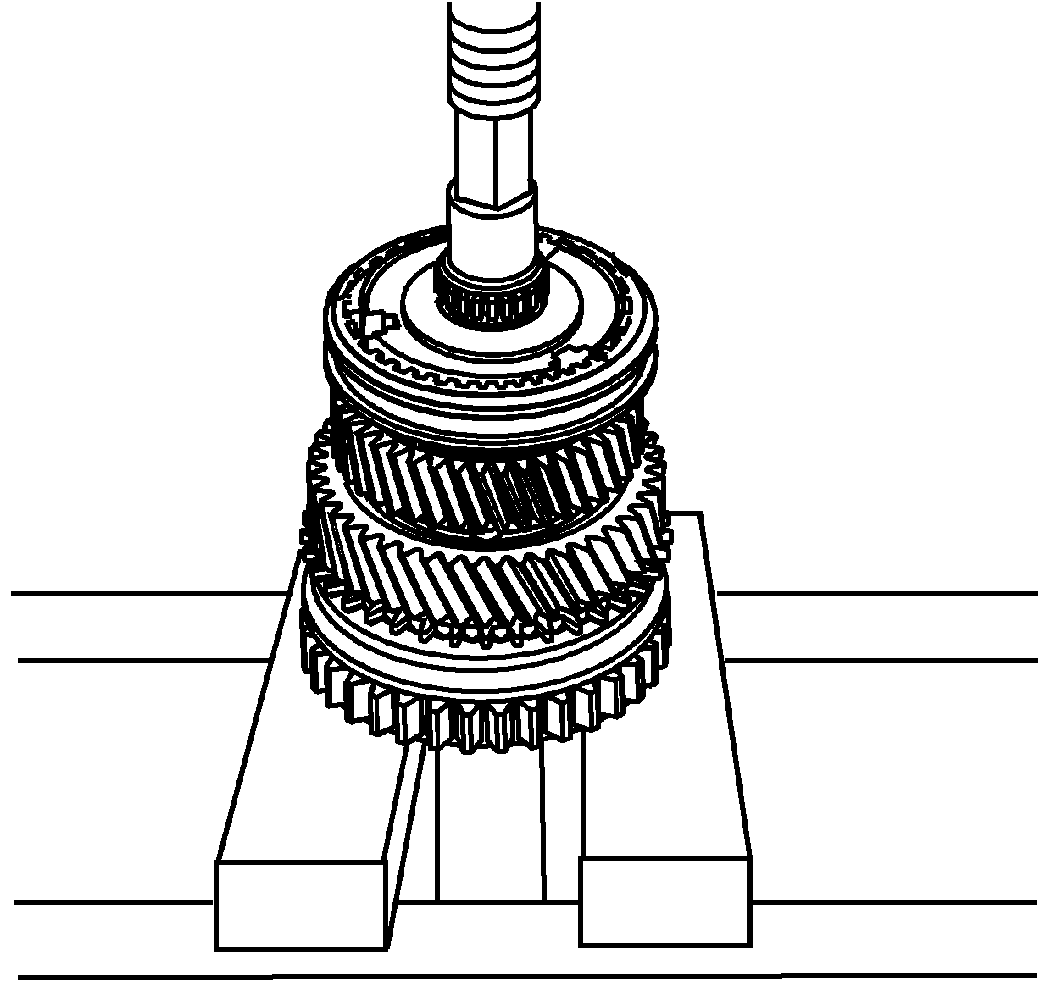
- Using a hydraulic press, install a new 3rd/4th synchronizer hub on the output shaft.
- Support the synchronizer hub on the center flange with a suitable tube.
- Align the blocking rings with the hub and the 3rd gear while pressing.
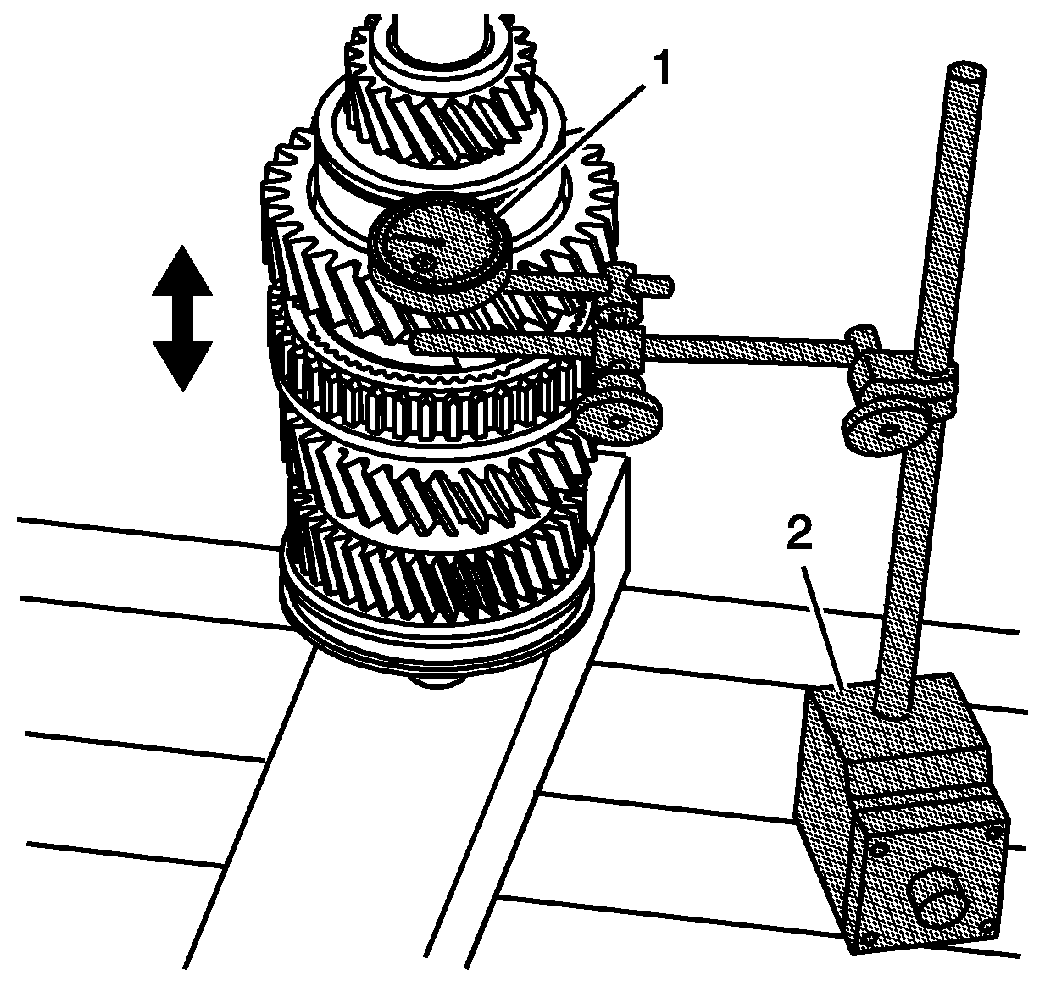
- Using J 8001-3
or J 26900-12
(1) and J 26900-13
(2), measure the 3rd gear axial play. See Special Tools .
Specification:
- Standard Clearance: 0.10-0.25 mm (0.0039-0.00098 in)
- Maximum Clearance: 0.30 mm (0.0118 in)
- Position J 8001-3 or J 26900-12 (1) on the top of the gear teeth. See Special Tools .
- Zero the gauge.
- Lift up on the gear to measure the clearance.
- If the clearance exceeds the maximum, ensure the hub is installed completely.
- If the clearance exceeds the maximum, inspect the 3rd gear, the output shaft, or the 3rd/4th synchronizer hub for wear.
- If clearance is lower than the standard clearance, inspect the 3rd gear, the output shaft, or the 3rd/4th synchronizer hub for burrs.
- Repair or replace the damaged or worn component.
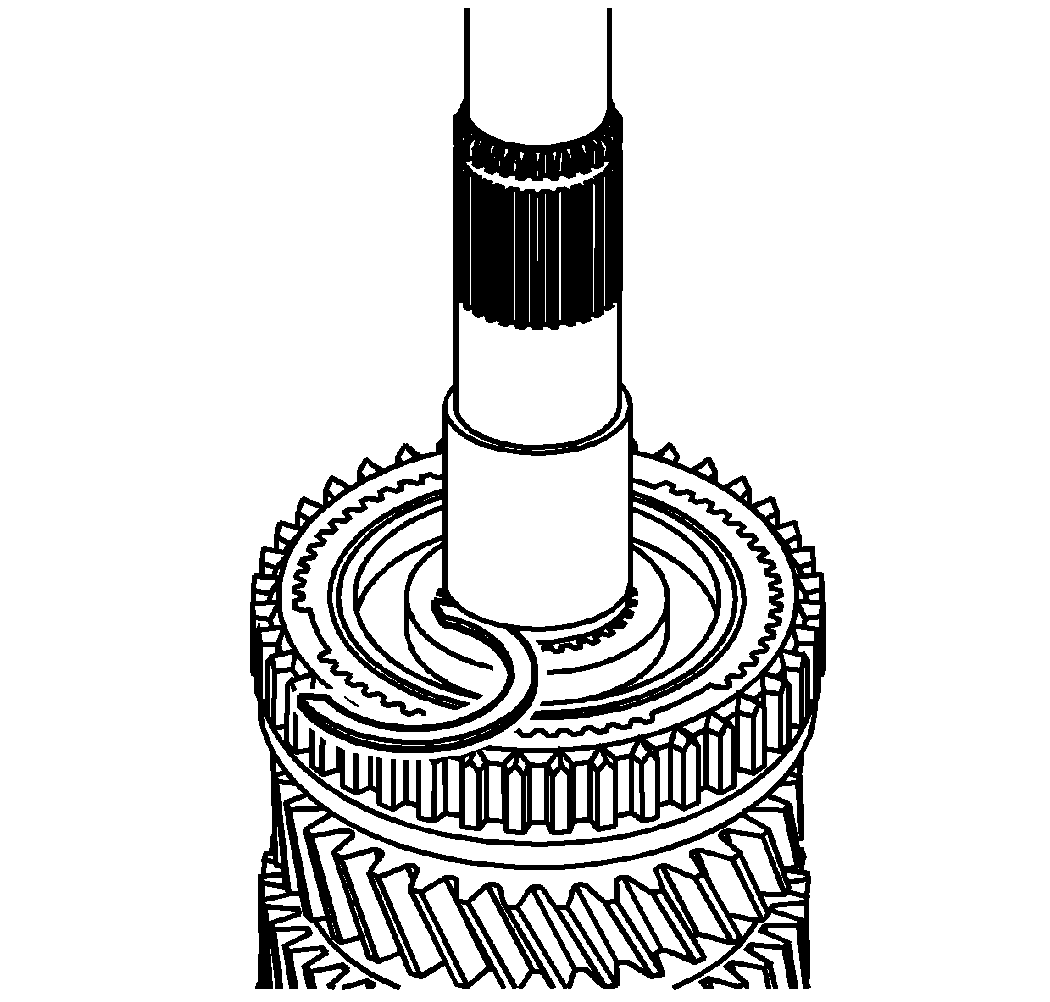
- Install the 3rd/4th synchronizer sleeve on the hub while pushing in on the inserts. The step shoulder side of the sleeve goes forward to 4th gear.
- Select the maximum thickness retaining ring for the 3rd/4th synchronizer hub, that will fit in the groove. Refer to 3rd and 4th Gear Synchronizer Retaining Ring Specifications .
- Install the 3rd/4th synchronizer hub retaining ring.
- Install the 2nd gear bearing (123) and the 2nd gear (120) on the rear of the output shaft.
- Remove the 1st gear blocking rings from the 1st/2nd synchronizer assembly. The rings will be installed after pressing on the hub.
- Install the 1st/2nd synchronizer hub assembly (215) on the output shaft, with the shift fork side of the reverse gear toward 2nd gear.
- Using a hydraulic press, press the 1st/2nd synchronizer assembly onto the output shaft.
- Support the synchronizer hub on the center flange.
- Align the tabs of the blocking rings to the notches in the synchronizer hub and the 2nd speed gear.
- Using J 8001-3
or J 26900-12
(1) and J 26900-13
(2), measure the 2nd gear axial play. See Special Tools .
Specification:
- Standard Clearance: 0.10-0.25 mm (0.0039-0.00098 in)
- Maximum Clearance: 0.30 mm (0.0118 in)
- Position J 8001-3 or J 26900-12 (1) on the top of the gear teeth. See Special Tools .
- Zero the gauge.
- Lift up on the gear to measure the clearance.
- If the clearance exceeds the maximum, ensure the hub is installed completely.
- If the clearance exceeds the maximum, inspect the 2nd gear, the output shaft or the 1st/2nd synchronizer hub for wear.
- If clearance is lower than the standard clearance, inspect the 2nd gear, the output shaft or the 2nd/3rd synchronizer hub for burrs.
- Repair or replace the damaged or worn component.
- Select the maximum thickness retaining ring for the 1st/2nd synchronizer hub, that will fit in the groove. Refer to 1st and 2nd Gear Synchronizer Retaining Ring Specifications .
- Install the 1st/2nd synchronizer hub retaining ring.
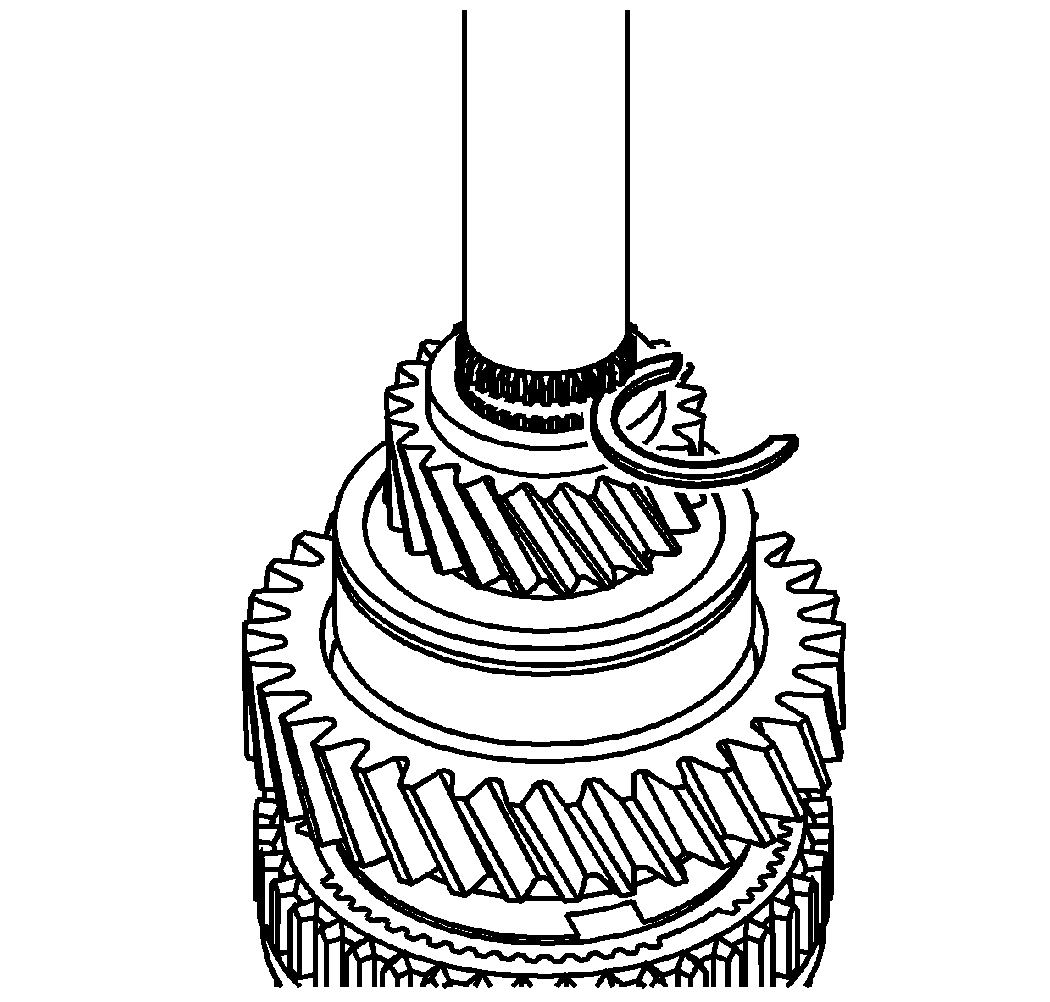
- Install the 1st gear synchronizer rings. Align the blocking ring tabs to the notches in the hub.
- Install the 1st gear spacer.
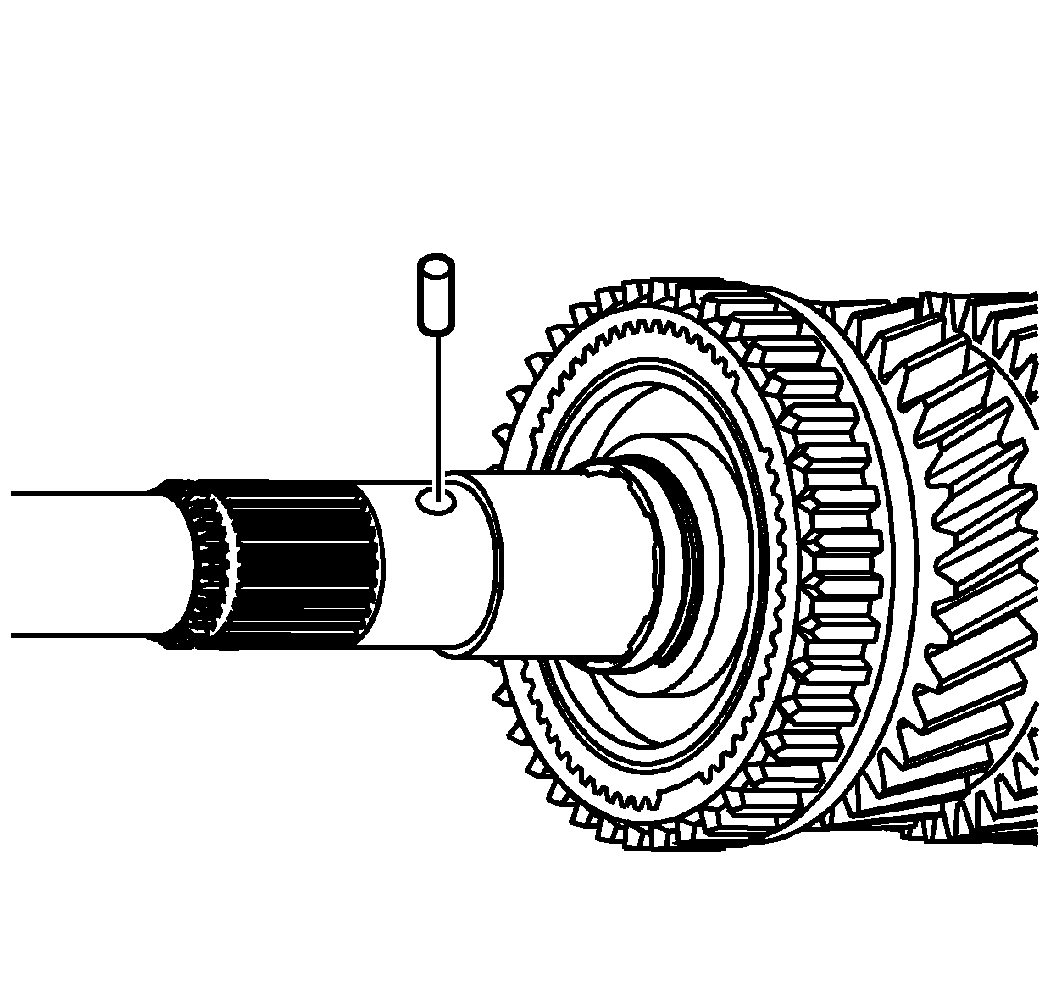
- Install the 1st gear thrust washer lock pin.
- Install the following components to the rear of the output shaft:
- The 1st gear bearing (113)
- The 1st gear (110)
- The 1st gear thrust washer (116)
- The output shaft rear bearing (193)
- The 5th gear (150)
The shorter shoulder goes toward the bearing.
- Using a hydraulic press and J 6133-A
for 4WD, or J 44340
for RWD, press the output rear bearing and the 5th gear onto the output shaft. See Special Tools .
- Ensure the tabs of the blocking rings align to the notches in the synchronizer hub.
- The retaining ring groove side of the bearing faces 5th gear.
- Using J 8001-3
or J 26900-12
(1) and J 26900-13
(2), measure the 1st gear axial play. See Special Tools .
Specification:
- Standard Clearance: 0.20-0.45 mm (0.0079-0.0177 in)
- Maximum Clearance: 0.50 mm (0.0197 in)
- Position J 8001-3 or J 26900-12 (1) on the top of the gear teeth. See Special Tools .
- Zero the gauge.
- Lift up on the gear to measure the clearance.
- If the clearance exceeds the maximum, ensure the rear output shaft bearing is installed completely.
- If the clearance exceeds the maximum, inspect the 1st gear, the output shaft or the thrust washer for wear.
- If clearance is lower than the standard clearance, inspect the 1st gear, the output shaft or the thrust washer for burrs.
- Repair or replace the damaged or worn component.
- Select the maximum thickness retaining ring for the 5th gear, that will fit in the groove. Refer to Fifth Gear Retaining Ring Specifications .
- Install the 5th gear retaining ring.
- If RWD, install the speed sensor reluctor wheel front retaining ring.
- Install the speed sensor reluctor wheel locating ball.
- Install the speed sensor reluctor wheel.
- Install the speed sensor reluctor wheel rear retaining ring.
IMPORTANT:


IMPORTANT:
The retaining ring is a select fit. Always install a new retaining ring.


IMPORTANT:
The retaining ring is a select fit. Always install a new retaining ring.


IMPORTANT:
The retaining ring is a select fit. Always install a new retaining ring.
 Courtesy of GENERAL MOTORS CORP.