Roof Moulding Loose / Adrift (LTB00861V2)
WARNING: This page is about the Range Rover Base, which is a different variant/trim than selected.
Publication date: 2016-10-10Reference number: LTB00861V2
Supersedes refnos: LTB00861, LTB00861NAS2
ROOF MOULDING LOOSE / ADRIFT
TECHNICAL SERVICE BULLETIN
Reference Number(s): LTB00861NAS2, Date of Issue:
October 10, 2016
| LAND ROVER: | 2014 Onwards Range Rover Sport (LW); 2013 Onwards Range Rover (LG) |
| SECTION: | 501-08 |
| AFFECTED VEHICLES: | Range Rover Sport (LW) Model Year: 2014 Onwards VIN: 001154 Onwards Assembly Plant: Solihull; Range Rover (LG) Model Year: 2013 Onwards VIN: 001204 Onwards Assembly Plant: Solihull |
MARKETS
NAS
CONDITION SUMMARY
Situation: The roof moulding(s) may be loose / adrift.
Cause: This may be caused by incorrect installation of the roof moulding.
Action: Should a customer express this concern, follow the Service Instruction below.
PARTS
PARTS INFORMATION
| LR078295 | Adhesive kit | 1 |
| LR056666 | Roof moulding fixing kit - Non-Panoramic Roof - Range Rover Sport (L494) | 1 |
| LR075337 | Roof moulding fixing kit - Right - No sunroof - Range Rover Sport (L494) | 1 |
| LR075339 | Roof moulding fixing kit - Left - No sunroof - Range Rover Sport (L494) | 1 |
| LR072887 | Roof moulding fixing kit - Right - Range Rover Sport (L494) | 1 |
| LR072889 | Roof moulding fixing kit - Left - Range Rover Sport (L494) | 1 |
| LR056667 | Roof moulding fixing kit - Panoramic Roof - Range Rover Sport (L494) | 1 |
| LR052896 | Roof moulding fixing kit - Non-Panoramic Roof - Range Rover (L405) | 1 |
| LR072882 | Roof moulding fixing kit - Right - Range Rover (L405) | 1 |
| LR072883 | Roof moulding fixing kit - Left - Range Rover (L405) | 1 |
| LR075344 | Roof moulding fixing kit - Right - Range Rover (L405) | 1 |
| LR075165 | Roof moulding fixing kit - Left - Range Rover (L405) | 1 |
| LR075166 | Roof moulding fixing kit - Long Wheelbase - Right - Range Rover (L405) | 1 |
| LR075291 | Roof moulding fixing kit - Long Wheelbase - Left - Range Rover (L405) | 1 |
| LR052895 | Roof moulding fixing kit - Panoramic Roof - Range Rover (L405) | 1 |
WARRANTY
NOTE:
Repair procedures are under constant review, and therefore times are subject to change; those quoted here must be taken as guidance only. Always refer to TOPIx to obtain the latest repair time.
NOTE:
DDW requires the use of causal part numbers. Labor only claims must show the causal part number with a quantity of zero.
WARRANTY INFORMATION
| DESCRIPTION | SRO | TIME (HOURS) | CONDITION CODE | CAUSAL PART |
|---|---|---|---|---|
| Roof moulding - Left - Repair | 76.42.89.32 | 0.2 | 07 | RZM500041 |
| Roof moulding - Right - Repair | 76.42.89.33 | 0.2 | 07 | RZM500041 |
| Roof moulding - Both sides - Repair | 76.42.89.34 | 0.4 | 07 | RZM500041 |
NOTE:
Normal Warranty procedures apply.
SERVICE INSTRUCTION
NOTE:
Range Rover (L405) non-panoramic roof shown; all others similar.
- Location of components.NOTE: If required, repeat this step on both sides of the vehicle.
- Remove the roof moulding (see TOPIx Workshop Manual section 501-08: Exterior Trim and Ornamentation - Roof Moulding).NOTE: Use a suitable degreaser to clean any residue from the foam pads.NOTE: Inspect the roof moulding for damage.NOTE: If required, repeat this step on both sides of the vehicle.
- Remove and discard the foam pads.NOTE: If required, repeat this step on both sides of the vehicle.
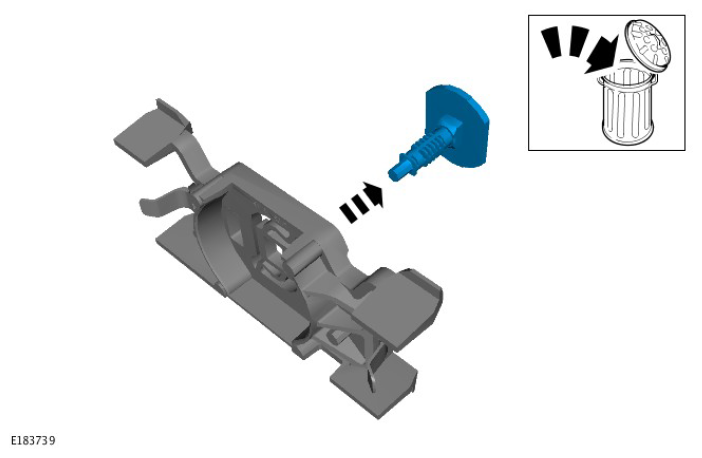
- Remove the roof moulding adhesive pad.CAUTION: The roof moulding clips are a one time installation only.NOTE: If required, repeat this step on both sides of the vehicle.
- Remove the roof moulding clips.NOTE: If required, repeat this step on both sides of the vehicle.NOTE: Repeat this step on all roof moulding clips.
- Remove and discard the original clips from the plastic retaining clips.NOTE: If required, repeat this step on both sides of the vehicle.NOTE: Repeat this step on all roof moulding clips.
- Install the new clips into the plastic retaining clips.NOTE: If required, repeat this step on both sides of the vehicle.
- Install the roof moulding clips into the roof moulding.NOTE: If required, repeat this step on both sides of the vehicle.
- Install the new roof moulding foam pads in the same location they were removed from.NOTE: If required, repeat this step on both sides of the vehicle.
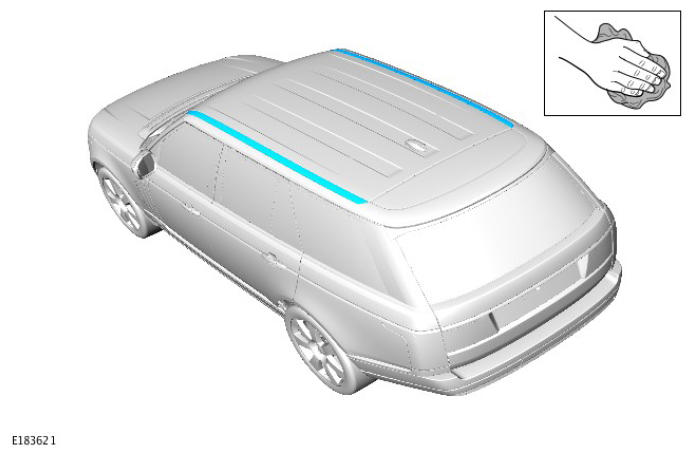
- Clean the vehicle with a suitable cleaner in the area shown.NOTE: Repeat this step on both sides of the vehicle.
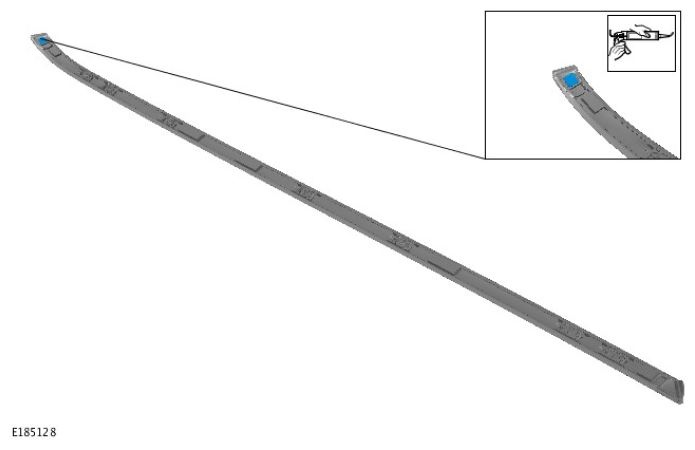
- Apply the sealer in the area shown.NOTE: If required, repeat this step on both sides of the vehicle.
- Install the roof moulding (see TOPIx Workshop Manual section 501-08: Exterior Trim and Ornamentation - Roof Moulding).NOTE: If required, repeat this step on both sides of the vehicle.NOTE: The roof moulding must fit under the windshield aperture seal.NOTE: Remove the securing tape and any residue from the tape with a suitable cleaner when the sealer has fully cured.
- Make sure the roof moulding is correctly installed.
- Use a suitable tape to hold down the roof moulding in the area shown.